
Table of Contents
- What is Tautulli?
- What can it do?.
- Prerequisites:
- Install Tautulli Docker using Portainer.
- Connect to the Tautuli dashboard
WHAT IS TAUTULLI?
Tautulli is a 3rd party application that runs alongside Plex to monitor and give you more information about your Plex media server. It has no affiliation with Plex as a company and is free and open source.
WHAT CAN IT DO?.
Track what is being watched. Useful if you have storage limits and need to free up space. If it is not being watched remove it.
Tracks user’s devices to ensure they are not handing out their login details to their friends with IP tracking. (It happens)
Set notifications to multi-agents for example email or even Discord. You can set when you want to be notified. This can get very specific for instance when someone plays or pauses playback. It can let you know.
Warning these notifications can get annoying and spammy depending on which ones you turn on so have that in mind when enabling a notification.
Tautulli can be controlled from your mobile devices using their apps or even Siri.
All of this data is displayed into a nice clean dashboard interface with graphs and tables.
PREREQUISITES:
- Docker and Portainer Installed.
- A volume created in Portainer to be used for the Tautulli container storage (Appdata folder).
- A Plex server container and a Media folder with media files.
- A Plex Account.
INSTALL TAUTULLI DOCKER USING PORTAINER.
STEP 1 – CREATE THE CONFIG FOLDER AND LINK YOUR PLEX LOG FILES.
Open up a terminal or Putty application.
Connect to your Raspberry Pi via SSH (secure shell).
ssh -p PORT USERNAME@YOURRASPBERRYPIIP
Navigate to your “Appdata” folder or the place where you store all your containers persistent configuration data.
cd /srv/YOURUSBDISKUUID/Appdata
Create a folder called “tautulli“.
mkdir tautulli
Navigate into the “tautulli” folder.
cd tautulli
Create the “config” folder where all the Plex configuration data will reside.
mkdir config
Now navigate into the “config” folder.
cd config
From here you will need to get your “absolute path” for your “config” folder.
pwd
Copy the output of the pwd command and paste it into a text file. You will need this in Step 2.
You now need to locate your “plex” docker containers “Appdata/config” folder. Within this folder buried in the folders is a “log” folder.
Navigate into this folder using the same commands as above
cd /srv/YOURUSBDISKUUID/Appdata/plex/config/Library/Application\ Support/Plex\ Media\ Server/Logs
Once in the log folder use the “pwd” command to get the absolute path.
pwd
Copy and paste the output path into the same text file as above so you can add them to your stack in Step 2.
STEP 2 – CREATE THE DOCKER COMPOSE STACK
Navigate to your Portainer dashboard and log in.

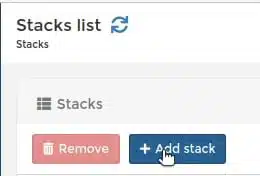
From the left hand menu click on “Stacks“.

Now in the Stacks dashboard click on “Add a stack“.
In the “Name” field enter “tautulli“
Now Copy and paste the following docker-compose data into the “Web editor” field. Be sure to change all the file paths to the absolute paths you saved to a text file in step 1.
TAUTULLI DOCKER COMPOSE STACK
---
version: "2.1"
services:
tautulli:
image: ghcr.io/linuxserver/tautulli
container_name: tautulli
environment:
- PUID=1000
- PGID=1000
- TZ=America/New_York
volumes:
- <path to data>:/config
- <path to data>:/plexlogs
ports:
- 8182:8181
restart: unless-stopped
My personal stack (as an example that shows full pats):
version: “2.1”
services:
tautulli:
image: ghcr.io/linuxserver/tautulli
container_name: tautulli
environment:
– PUID=1000
– PGID=1000
– TZ=America/New_York
volumes:
– :/var/lib/docker/volumes/eb982073878bdecba049e24285de40b6f35314f08268f533f0c08b490314a646/_data/tautulli/config
– :/var/lib/docker/volumes/plex_config/_data/Library/Application\ Support/Plex\ Media\ Server/Logs
ports:
– 8182:8181
restart: unless-stopped
Once you have completed that you are ready to click “Deploy the stack“.

If you navigate to “Containers” in the left menu

You should now see your “tautulli” container in the list.
Give the container a few minutes to fully start up then you can connect to the Tautuli dashboard GUI.
Connect to the Tautuli dashboard
Enter your Tautulli server address as:
http://<YOUR_SERVER_IP>:8182
You should now see the Tautulli “Set Up Wizard“. Follow the prompts to:
- Create a Tautulli User Name and Password
- Sign in with your Plex account (you shoukd get the “Authentication was succesful” prompt
- Select your Plex server from the drop-down menu. Since we are accessing within our LAN there’s no need to enable Remote Server or Secure Connection options. Click on Verify . A “Server found” message should appear. Click Next.
- Set Activity Logging. The default 120 seconds is ok, click Next. Notifications page, read and click Next and then Finish.
Click on Sign In next, which uses your Plex account to sign in.